Stabilizers explained: from stock rattle to silent smoothness
Stabilizers are the most acoustically influential component most builders treat as an afterthought. Understanding what they are and why they fail changes every build that follows.
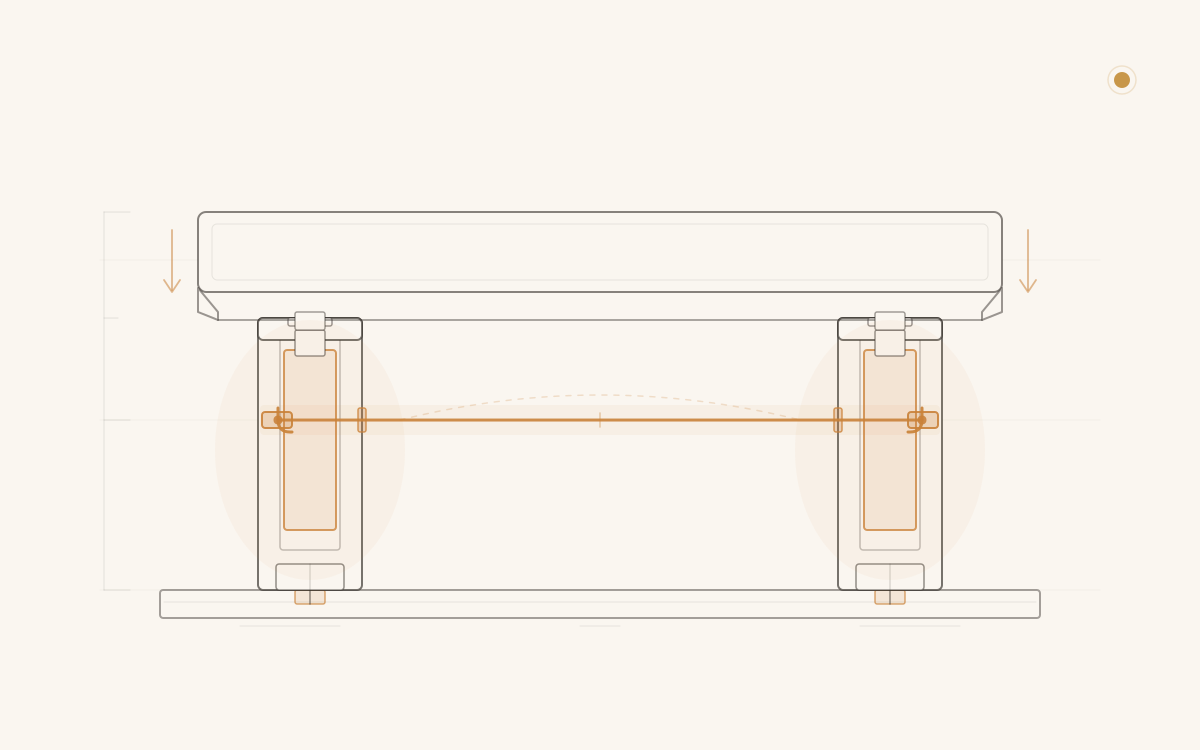
The space bar on an unserviced board is almost always the loudest key on it. Not because the switch is bad or the case is thin — but because the two stabilizers flanking that switch are rattling, wicking, and slapping on every keystroke in ways no amount of switch modding can fix downstream. Stabilizers are mechanical components with their own failure modes, their own lubing logic, and their own upgrade path. This guide covers all of it.
What a stabilizer does — and why it affects sound
A stabilizer's job is to keep a wide keycap level as it travels. Any key longer than roughly 2u (two units wide) needs a stabilizer on each end because the keycap overhangs its switch by enough that an off-center press would tilt the cap rather than depress it cleanly. The stabilizer connects the two ends of the cap to a wire that runs between two housings, constraining the cap so both ends move together.
That mechanism introduces several contact points that are not present in a single-switch key:
- The wire ends rotate inside housing barrels on every keystroke.
- The stabilizer stems slide inside housing bores.
- The wire hooks into slots at the bottom of those stems.
- The housing feet press against the PCB surface under load.
Each of those contact points is a rattle source. On a stock stabilizer without any modification, most or all of them are dry — plastic on plastic, metal on plastic, metal on metal — and the cumulative sound is the characteristic stabilizer rattle that makes a spacebar sound worse than everything around it.
The acoustic path is direct: keystroke force travels through the keycap, through the stabilizer wire, through both housings, and into the PCB. Every dry interface along that path transmits vibration rather than absorbing it. The switch in the middle of the spacebar is not contributing to that rattle. The stabilizers are.
Types of stabilizers
Three mounting types exist. They differ in how the housing attaches to the PCB or plate, which affects how firmly the mechanism is anchored and how easy it is to remove for servicing.
Plate-mount stabilizers clip into holes in the switch plate rather than attaching to the PCB. They are the only option on keyboards that do not expose PCB-mount holes — typically older or budget designs with minimal PCB footprint. The trade-offs are significant: they are harder to access without removing the plate, they provide less rigidity than PCB-mount types because the plate flexes more than the PCB, and they offer fewer servicing opportunities once the board is assembled. For a build that will be tuned, PCB-mount is strongly preferable when available.
PCB clip-in stabilizers attach directly to the PCB via two plastic clips that snap into holes on either side of the stabilizer footprint. They are tool-free to install and remove, which makes them easy to service. The trade-off is that the plastic clip provides less clamping force than a screw, which means the housing can shift very slightly under heavy use — a wobble that accumulates and becomes perceptible on an otherwise well-tuned board. For builds where access and serviceability matter more than long-term precision, clip-ins are reasonable.
PCB screw-in stabilizers use a small screw through the PCB to anchor the housing. They take slightly longer to install and remove, but the threaded connection eliminates the micro-movement that affects clip-ins. For any build where long-term stability matters — a board that will be used daily and tuned over months — screw-ins are the right choice. Virtually every premium aftermarket stabilizer ships as screw-in.
The rattle problem — three sources
Stabilizer rattle is not one sound. It is at least three sounds layered on top of each other, and a lube job that addresses only the most obvious source will leave the others intact.
Wire slop is the loudest and most immediately obvious. The wire ends rotate inside the housing barrels on every keystroke, and on a dry stabilizer, that metal-on-plastic contact produces a grinding or clicking transient. This is the source most guides address first, because it is the most audible and the fix — lubing the wire ends into the barrels — is intuitive. But fixing only this one leaves the other two intact.
Housing clearance refers to the gap between the stabilizer stem and the inside of the housing bore. Like a switch stem in its housing, this interface produces friction noise when dry. The symptom is a secondary scratch or rub that sits underneath the wire slap rather than on top of it. It is easiest to hear in isolation by pressing the stabilizer stem slowly without a keycap installed — a dry stem will produce a faint rub sound that a lubed stem does not.
Lube pooling and dry hook is the subtlest source and the one that survives incomplete lube jobs. The wire hooks into a slot at the bottom of each stabilizer stem, and that hook-in-slot joint flexes slightly on every keystroke — vertically as the key travels, laterally as the wire flexes between its two endpoints. On a correctly serviced stabilizer, the hook joint gets dielectric grease applied directly to it (which requires pressing the stem down to expose the hook fully). When that step is skipped, or when lube applied elsewhere migrates away from the hook joint over time, a faint clunk survives every other fix.
The standard tuning sequence
The sequence for a well-tuned stabilizer moves through four operations in order. Doing them out of order wastes effort — clipping before lubing means reassembling twice; lubing before inspecting the wire means lubing a bent wire that will still cause problems.
Step one: inspect and correct the wire. Before any lube touches the stabilizer, hold the wire horizontal against a flat surface and check for bends and for symmetric leg length. A wire whose legs are different lengths will cause one side of the key to drop before the other, producing a rocking sound that lube cannot fix. A bent horizontal span will create uneven tension across the key. Bend corrections are made with flat-nose pliers and patience — small corrections, frequent checks, never one large bend that introduces a counter-curve.
Step two: clip the stems. Many stabilizer stems ship with two small plastic nubs — called "legs" or "feet" — at the bottom of the stem body. These nubs were designed to limit stem travel, but on most current PCBs they are no longer functionally necessary, and they cause the stem to bottom out against itself rather than against the natural limit of the housing bore. Clipping them flush with small wire cutters eliminates this secondary contact point and reduces the bottom-out impact. Not all stabilizers have clips; check whether the nubs are present before this step.
Step three: lube each contact surface with the right material. This is the step with the most variables. The wrong lube in the wrong place makes the stabilizer worse, not better. The canonical pairing:
| Contact surface | Lube | Why |
|---|---|---|
| Wire ends (into barrel) | Dielectric grease | High-load, high-friction; thick compound stays in place |
| Stem bore interior | Krytox GPL-205 G0 | Thin enough not to impede stem travel; same as switch-stem lube |
| Stem cylinder exterior | Krytox GPL-205 G0 | Thin film on the sliding surface |
| Wire hook-in-stem slot | Dielectric grease | Flexing joint; thick compound handles the movement |
| Housing feet (underside) | Dielectric grease | Acoustic damping, not lubrication — thin smear only |
Step four: reassemble, install, and test. Reinstall the stem in the bore, hook the wire into the stem slot, and with the stem pressed down to expose the hook fully, apply the dielectric grease to the hook joint before releasing the stem. Install the housing onto the PCB — screw it down firmly if screw-in. Install the keycap and test by pressing each corner. Both sides of the key should descend at the same rate; the keystroke should land with a single uniform sound rather than a rattle-first-thud-second sequence.
For the diagnostic detail behind the step that survives most incomplete service jobs — and why the housing feet matter more than most guides suggest — see stabilizer servicing: the one step most builders skip.
Factory stabilizers versus aftermarket
The default stabilizers that ship with most keyboards range from serviceable to genuinely bad. The range matters because the decision to upgrade is not the same for every build.
Budget-board factory stabilizers — the plate-mount or clip-in units that ship with entry-level boards from Keychron, Royal Kludge, and similar manufacturers — are typically worth replacing before servicing. The housing tolerances on the cheapest factory stabilizers are loose enough that no lube job fully compensates for the slop. The wire is often slightly bent from factory assembly. The stems are not clipped. Putting thirty minutes of lube work into a stabilizer with those characteristics is less efficient than spending a small amount on aftermarket replacements.
Mid-range factory stabilizers — the screw-in units that ship with boards in the $150–$350 range from vendors like Mode, Keychron's higher lines, and most group-buy offerings — are usually serviceable to a good result. The housings are tighter, the wire is typically straight, and the stems may already be partially prepped. Servicing these is a reasonable investment.
Durock V2 and TX Stabilizers are the reliable aftermarket baseline — screw-in, tight housing tolerances, consistent wire geometry, widely available. Both respond well to the standard tuning sequence. The Durock V2 has been the default recommendation for the hobby for several years; the TX variant is slightly preferred by builders who prioritize housing tightness. Either choice is appropriate for any build where the stock stabilizers are being replaced.
Staebies (Staebilizers) and C³ Equalz represent the premium tier. Their wire geometry, housing finish, and stem tolerances are tighter than the V2 baseline in ways that are audible on a well-built board. The diminishing-returns curve is real, though: the gap between a correctly serviced V2 and a correctly serviced Equalz is smaller than the gap between an unserviced factory stabilizer and a serviced V2. The premium options matter most when the builder is chasing the last increment of performance on an otherwise complete build.
Diagnosing a bad stabilizer by sound
A tuned ear can identify which contact surface is still misbehaving without disassembly. The diagnostic approach is to isolate variables — install the keycap, press the key in different ways, and listen for where in the keystroke the problem sound lives.
Rattle at the very start of keystroke travel (before the key has moved more than a millimeter) points to wire-barrel contact. The wire is slipping or bouncing before it settles into its lube-loaded contact position. The fix is more dielectric grease in the barrel, or more even coverage around the wire circumference.
A secondary thud or clunk at the bottom of travel (after the initial keystroke sound) points to the wire hook joint or the housing feet. If the hook joint is dry, the clunk arrives a fraction of a second after bottom-out as the wire catches up. If the housing feet are dry, the clunk is the plastic foot striking the PCB surface at impact. The two are difficult to distinguish by sound alone — disassembly and checking both is faster than trying to isolate acoustically.
Rocking or asymmetric drop (one corner of the keycap descends before the other) points to wire geometry rather than lubing. No lube quantity fixes a bent wire or asymmetric leg length. The wire needs inspection and correction before any re-lubing is worthwhile.
Slow return travel on large keys, especially the spacebar, points to too much dielectric grease in the wire barrel. The grease creates resistance on the upstroke that exceeds the spring force on large keys. Disassemble, wipe the barrel, and reapply with approximately half the previous quantity.
What to watch for next
The stabilizer landscape has been stable for several years — Durock V2 and TX remain the reliable baseline and are unlikely to be displaced without a meaningful tolerance improvement. The area where incremental development continues is in pre-built and pre-tuned stabilizer offerings: some vendors have begun shipping stabilizers already lubed and clipped, with consistent factory application quality. That category is worth monitoring for builders who want a clean result without the servicing overhead, provided the factory lube work is verified rather than assumed.
The servicing fundamentals in this guide do not change regardless of what ships. A correctly tuned stabilizer — any mounting type, any brand tier — sounds different enough from an unserviced one that the work earns itself back on the first afternoon of typing. That difference registers over a workday in ways no sixty-second benchmark captures — see why typing tests lie. With stabilizers tuned, plate material is typically the next acoustic variable a builder encounters — the substrate between the switch and the case that determines how much bottom-out energy is transmitted versus absorbed. For the broader acoustic stack — where PE foam, tape mod, and the O-ring mod address resonance paths in the case cavity and at the PCB standoffs — sound dampening compared maps how each mod fits alongside stabilizer tuning.
Keep reading
- Guides
Lubing 101: what matters, what doesn't, and where to stop
Lube moves the sound and feel of a switch in ways nothing else in the build can. It also chews up a Saturday and ruins switches when applied with the enthusiasm the rabbit-hole crowd recommends. Here is the version that earns its keep.
thock9 min read - Guides
Sound dampening, compared: case foam, plate foam, PE foam, and the tape mod
Four layers, four very different jobs. Here is what each sound mod actually changes, where it sits in the build stack, and the order to stack them in if you only have time for one or two.
thock9 min read - Guides
Mounting styles, compared: gasket, top-mount, tray, and integrated plate
A builder who has lubed switches and tuned stabilizers and chosen a keycap profile and still cannot place why their next board feels different from their last one is usually meeting the mount style. The plate's relationship to the case is the half of the typing feel that nobody discusses on a sound test.
thock13 min read - Deep Dives
Why stabilizers rattle: the engineering behind a smooth stab
A stabilizer has to be loose enough to slide and tight enough to stay quiet, and those two requirements contradict each other at three separate interfaces. Every rattle, tick, and clunk on a spacebar is one of those interfaces losing the argument.
thock10 min read